Generate a Key Pair Using GPG for Windows
To generate a key pair using GPG for Windows:
-
Download the GPG Installer for Windows
-
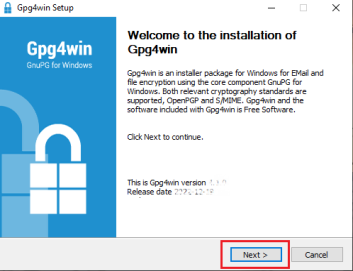
Run the installer and click Next >
-
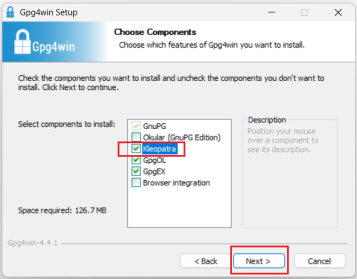
Make sure that the component Kleopatra is selected as one of the sub-components to include in the installation and click Next >
-
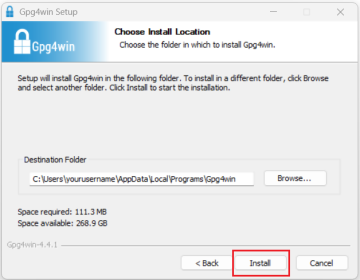
The default installation folder will be displayed. Click Install.
-
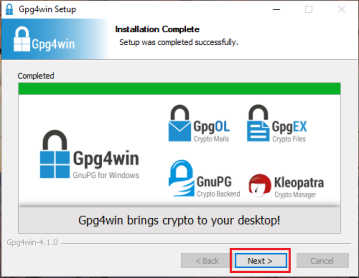
Once the installation has completed, click Next >.
-
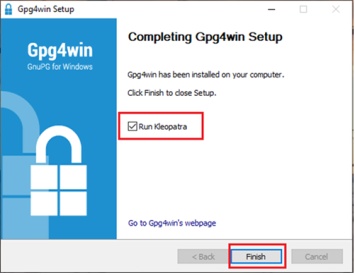
Make sure the checkbox Run Kleopatra is active and click Finish.
-
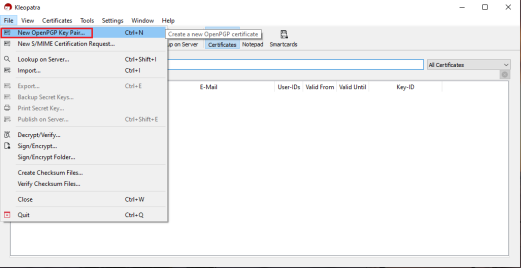
Kleopatra will now open. Click the top menu File and select New OpenPGP Key Pair...
-
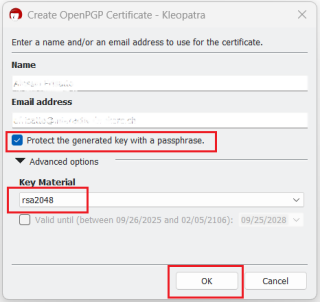
Enter your full Name and your Email address.
Please note:
-
Make sure the checkbox Protect the generated key with a passphrase is active
-
Select rsa2048 as Key Material
-
Make sure the checkbox “Valid until…” is deactivated
Click OK
-
-
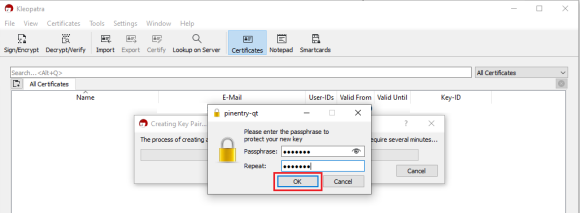
You will be asked to enter a passphrase and type it again in the field Repeat: to confirm you made no typing errors. Once done, click OK.
PLEASE NOTE: Keeping a secure copy of this password is essential. Any loss of this password will require the whole process to be repeated.
-
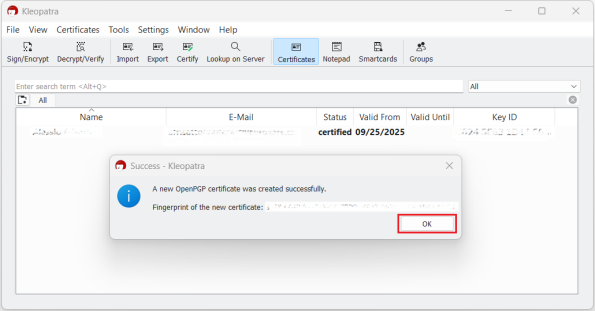
A pop-up will confirm that the certificate has been successfully created. Click OK.
-
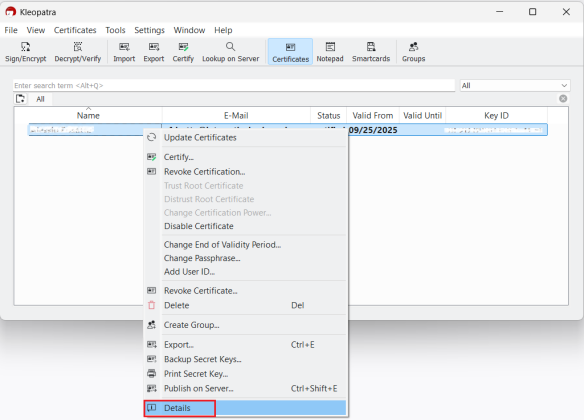
Right click on the Certificate and select Details
-
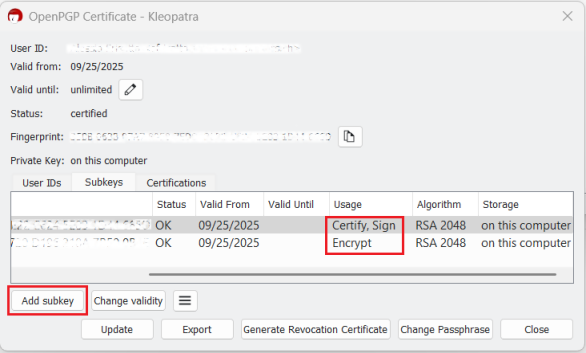
In the tab: Subkeys, make sure that the functions “Certify, Sign, Encrypt” are present. Then click on Add subkey
-
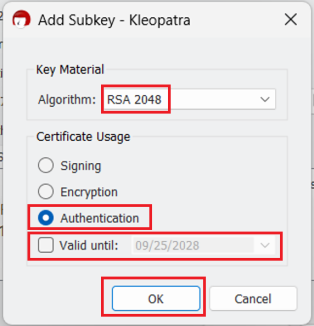
Select RSA 2048 as Algorithm.
Additionally:
-
Select Authentication as Certificate Usage
-
Make sure the checkbox “Valid until…” is deactivated
Click OK
-
-
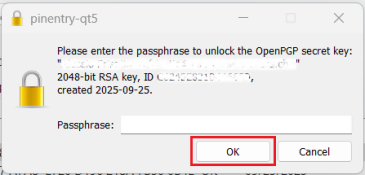
You will be asked to enter the passphrase that you created it at point 9. Type the passphrase and click OK.
-
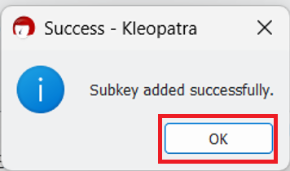
You should then receive the message “Subkey added successfully. Click OK.
-
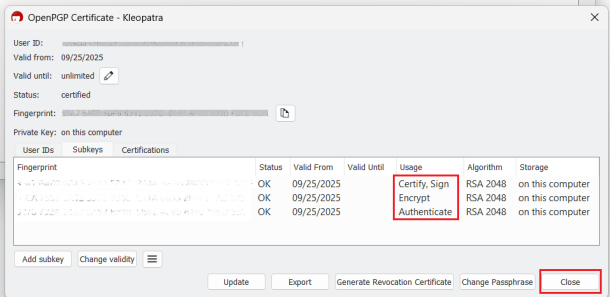
Make sure that the functions “Certify, Sign, Encrypt, Authenticate” are all present. If they are all present, click on Close
In case one or more function is missing, you can click on Add subkey and add the subkey for that specific function, as explained in the previous points (12 to 15). Repeat the procedure until all the 4 functions are present
-
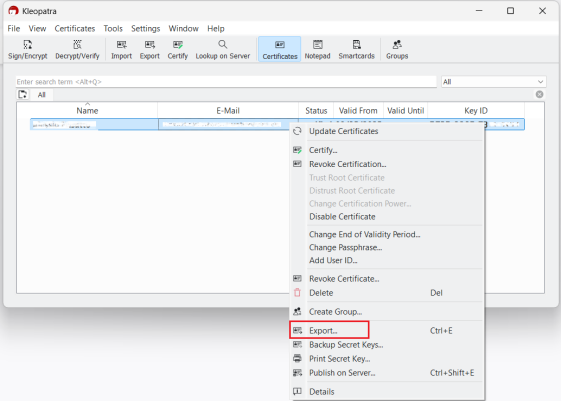
In the Certificates panel, right-click on the certificate and select Export...
-
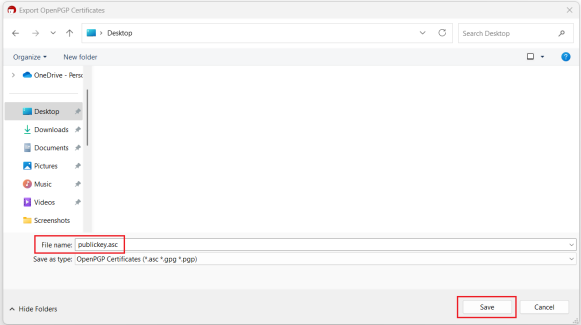
Navigate to the directory where you want to save your public portion of your key (e.g. Desktop). Choose a name such as publickey.asc and click Save.
-
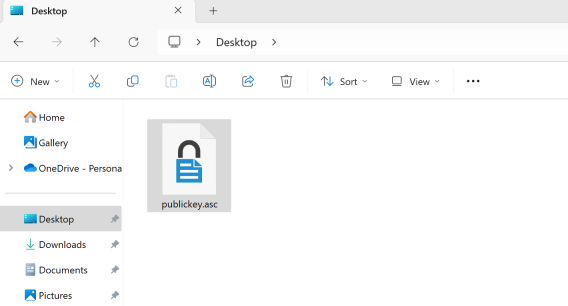
Open the Windows File Explorer and navigate to the directory where you saved the key. You will find the publickey.asc file ready to be sent to us via Message Center ticket or email as per instructions in this article:
-
Although this is not strictly needed, we strongly recommend you to perform a backup of your Key Pair, following the steps here. This backup copy of the certificates can be imported again in Kleopatra in case the original set becomes corrupted or accidentally deleted.