Enter a Basic FOP Position Transfer
Instructions
-
Click Transfer & Pay > Transfer Positions.
-
Alternatively, click Menu in the top left corner > Transfer & Pay > Transfer Positions
-
-
If you have multiple accounts or account partitions, or if you have a master account and manage one or more client or sub accounts, the Account Selector will open. Select the account you want to use or find it with the search function. Click Continue to submit your selection.

-
In the Transaction Type list, select one of the following:
-
Incoming - Notify us of your intention to transfer assets from another bank or broker to your account here.
-
Outgoing - Transfer assets to another bank or broker from your account here.

-
-
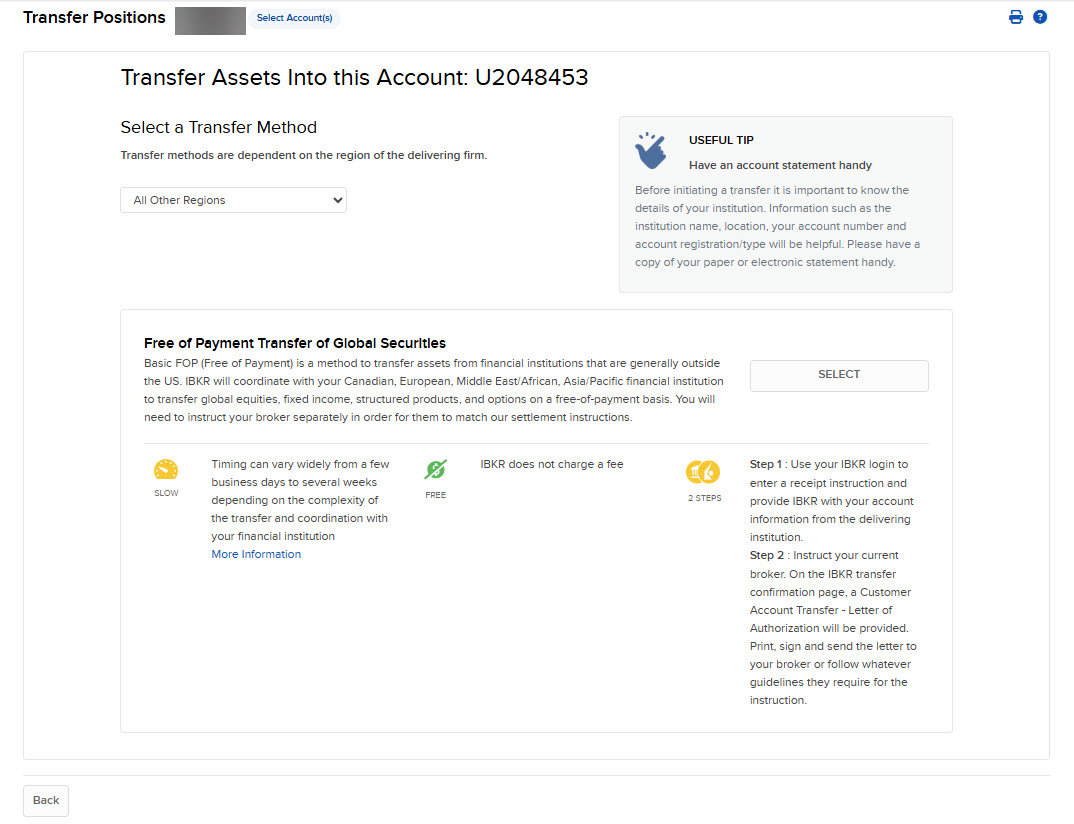
Select a region from the drop down list.

-
A list of transfer options will populate. Select the Free of Payment Transfer of US Securities option.
-
In the Broker Information section, you can use previously saved broker information, enter new broker information without saving it, or enter new broker information and save it for future use. In the last case, you cannot transfer assets until you save the broker information and enter a new FOP transfer request using that information.

-
To use previously saved broker information, click the toggle to Yes, and select the saved information from the drop-down.
To enter new broker information without saving it, click the toggle to No, then complete all fields. When asked about saving the broker information, click No.
To enter new broker information and save it for future use, click the toggle to No, complete all fields, and when prompted to save the broker information, click the toggle to Yes and enter the broker’s name.
Note: To save new Broker Information, click the toggle to Yes, then click Continue and complete all fields. Once the new information is confirmed, you can initiate a new Basic FOP transfer.
-
-
To continue with a Basic FOP transfer without saving new broker information, click Add Asset in the Transaction Information section.


-
In the Asset Search window, select an asset type from the drop-down. For example, select Stock.
-
Select the Search Type (by Symbol, by CUSIP number or by ISIN number), then enter the symbol and, optionally, an exchange.

-
The Asset Search window refreshes with a list of matching symbols. Click the one you want to transfer.
Click Search Again to start a different asset search.
-
Enter the quantity and click the toggle to Yes to transfer the entire position of the symbol you've selected.

-
Only available for long US Stock positions, US Warrant positions, and Corporate Municipal Bond positions.
-
-
Click Save and Finish. The assets are added to the list of assets to transfer.

-
You can remove assets from your transfer by clicking the x in the asset list.
-
Click Continue.
-
Type your signature in the Signature field, then click Continue. For outbound Basic FOP transfers, this completes the procedure.
-
Click Back to modify your transfer request.
-
For inbound Basic FOP notifications, after you type your signature and click Continue a Confirmation screen appears:
-
Instruct your third-party broker to send the assets you have specified. Note that
-
If your third-party broker requires an authorization form, click View Form to access and print one.
-
Sign the Letter of Authorization and send it to your third-party broker.
-
To upload a .CSV, follow the instructions for starting a partial position transfer request using ACATS.
-
Click Upload CSV, then select the .CSV file you have prepared for this position transfer request. The name of the file that you select will appear below the Choose a File button.

-
Click Submit. Provided there are no errors, a summary of the positions in your .CSV file and their eligibility for your selected transfer method appears in the Transfer Eligibility Summary window.
-
Click Continue to submit this request.